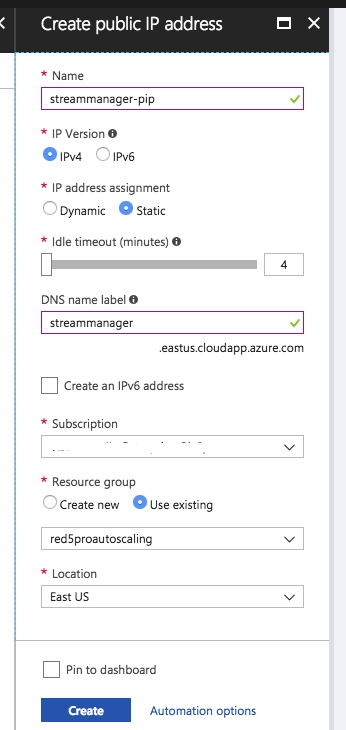
4. Reserve A Static IP Address
Note: Public IP resources are not the same as Reserved Virtual Addresses (Azure classic deployment).
- Navigate to the Azure portal
- Navigate to Public IP Addresses.
- Click on +Add
- Fill in the relevant information for creating a new IP public addresses
- Name: Name to associate with your Stream Manager
- IP Version: Select IPv4
- IP address assignment: Static
- Idle Timeout: 4 (Leave at default)
- DNS name label: None (Leave at default)
- Create an IPv6 address: Unchecked (Leave at default)
- Subscription: Select your subscription (Use the same subscription that is used for AD access authentication)
- Resource group: Select “Use existing” and select your autoscaling resource group.
- Location: Select the region where the IP address will be reserved.
- Click Create to create the IP address. It will take a few seconds to create the IP address resource.

How to delete a reserved public IP address using CLI or the portal’s GUI
USING PORTAL GUI
- Navigate to All Resources or Public IP Addresses in the portal.
- Identify the Public IP address resource and delete it.
USING AZURE CLI
az network public-ip delete -n <static-ip-resource-name> -g <resource-group-name>